Introduction
Alerts are pre-configured messages that are triggered when a change happens in monitoring.
Configuring alert actions
To configure an alert action:
- From All Clients, select a client.
- Go to Alerts, select the required alert ID.
- From the Action/Status column, click Select drop-down and select the required action.
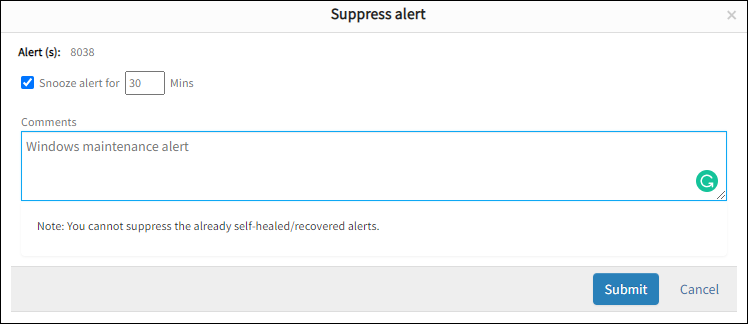
To snooze an alert from a specific duration:- From the Suppress alert window, select Snooze alert for x minutes.
- (Mandatory)Provide the time.

Suppress alert for a specific duration
- Provide comment for the action.
Note: To seTime value is mandatory for the snooze action.
The selected status appears in the Action/Status column.
Creating alert views
Alert views enable users to view alerts with certain attributes. An alert view can be a private or a shared view. For example, in an organization, a network administrator can create an alert view to display only Network related alerts and share the view across users in the organization.
- Shared View: Allow other users in the organization to access the view. Users with similar roles and permissions can access shared alert views.
- Private View: Set the view private to the view creator.
To create an alert view:
- From All Clients, select a client.
- Select Alerts > Manage Views.
- Click Add, select the alert attributes, and Save.
- Provide the view name and view type.
- Default View: Sets a view as default view. Default views are private and are restricted to the view creator.
- Shared View: Allows users within an organization to access the view.

Manage Alert Views
Creating alert reports
Alerts report displays a list of alerts triggered during a specified time period.
- From All Clients, select a client.
- Select Reports > Add > Alert Report.
- Select the attributes and click Generate Now to fetch the list of reports relevant to the filtered attributes.
- Click Apply Schedule to generate the alerts report at a specific time.
Filtering alerts by attribute
In order to find alerts that have certain attributes, view attributes by filtering by attribute.
To filter alerts by attribute:
- From All Clients, select a client.
- Select Alerts > Manage Views.
- Click Add and select the required attribute.
- Click Apply for a one time view of the filtered alerts.
- Click Save to save the view.
To filter for alerts that are triggered when resources are down:
- Select Special Attributes > Availability.
- Click Apply.