Introduction
First response policy allows you to auto-suppress alerts as a first response mechanism for frequent and unnecessary alerts.
Prerequisites
You must have OpsQ View and OpsQ Manage permissions to access First Response Policy.
Note
A training file is required to suppress specific alerts or to snooze specific alerts. The training file must include examples of alerts that need to be suppressed. See Alert Managament Training File for more information.Creating first response policies
To create a first response policy:
- From All Clients, select a client.
- Go to Setup > Alerts > First Response.
- Click Add button to create a first response policy.
- Provide a unique name for the policy.
- Select one of the modes from the Mode drop-down menu.
- From the Filter Criteria section, select resources whose alerts match this policy.
- Choose from Any or All of the defined conditions to apply as filter for the alerts.
- Select Native Attributes to use the available attributes that are predefined in OpsRamp.
- Select Custom Attributes to filter the alerts based on specific custom attributes of a client or a resource.
- From attributes drop-down list, select required attribute.
- From Operators drop-down list, select required Operator and provide the values.
- Choose from Any or All of the defined conditions to apply as filter for the alerts.
- From Policy Definition section, define conditions for suppressing alerts.
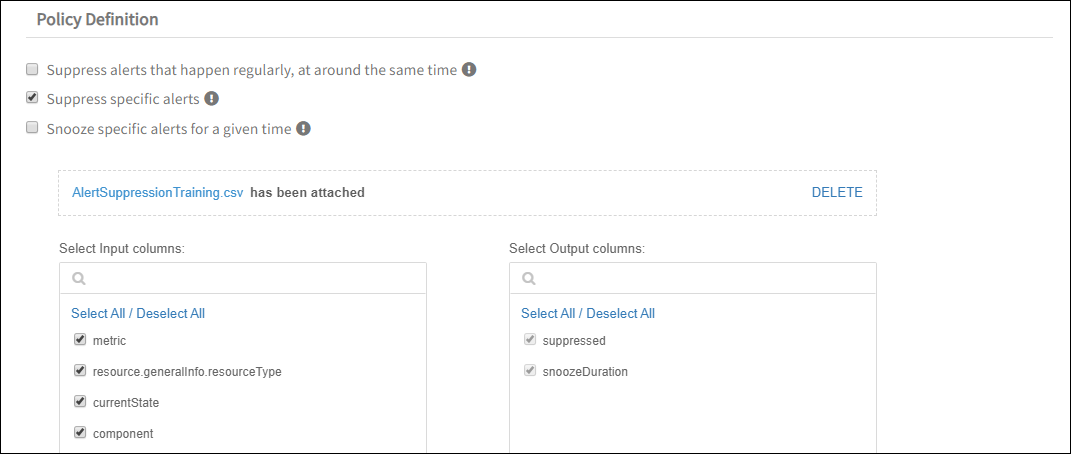
- Upload a training file if you select Suppress specific alerts and Snooze specific alerts options.
The training file must include examples of alerts that need to be suppressed. - Click Drop the training data file here, or browse to upload a CSV file.
Note: One client can upload only one training file. Changing the training file affects all learned policies of the client. - Select the file from your local folder. On uploading the file Input and Output columns appear.
- Validate the Input and Output columns.

- Click Continue to Model Training.
Input and Output columns appear. - Click Train Model. The accuracy of the trained First Response policy appears in the Summary section.
- Click Review.
- Review the summary from the Attribute Based configuration.
- To modify the configuration, click Edit.

First Response Policy Summary
- Upload a training file if you select Suppress specific alerts and Snooze specific alerts options.
- Click Save.
The first response policy is created and appears on the First Response Policies page.

Created First Response Policies
Editing policies
To modify the details of existing first response policy:
- Click on the policy name.
- From the policy page, click Edit.
- From EDIT FIRST RESPONSE POLICY, edit the details as required.
- Click Save.
Deleting policies
To delete a policy that is no longer used:
- Select the check box adjacent to the policy and then click Delete.
- Click Yes on the confirmation window. The policy is deleted from the First Response Policies List.
Creating copies
To create a new policy using the details of an existing policy:
- From the First Response Policies page, select the check box adjacent to the policy and click the copy icon. The NEW FIRST RESPONSE POLICY page is displayed with the main policy details.
- Provide a unique name for the policy.
- Modify the details as required.
- Click Save.
The new policy is created and displayed under First Response Policies List section.