Introduction
SSO integration configuration is done with both ADFS and OpsRamp. The configuration sets up redirects to the custom branded URL.
Prerequisite
- Partners must register with OpsRamp to receive OpsRamp login credentials.
- Provide your custom branding URL (such as
<yourwebsitename>.app.vistanet.jp).
ADFS configuration
ADFS configuration involves the following:
- Adding the relying party trust identifier.
- Editing the claim rules for the relying party trust.
- Adding rules.
- Editing the claims rules for the claims provider.
- Exporting the certificate.
Step 1: Add relying party trust identifiers
To add the relying party trust identifier:
- From ADFS, go to Tools > AD FS Management.
- From AD FS > Trust Relationships > Relying Party Trusts, select Add Relying Party Trust Wizard and
click Start to start the wizard configuration.
- On Specify Display Name, provide a unique display name and click Next.
- On Choose Profile, select the AD FS profile and click Next.
- On Configure Certificate, clear the Token encryption certificate field and click Next.
- On Configure URL, check Enable support for the SAML 2.0 WebSSO protocol and
provide the following URL subdomain:
https://yoursubdomain.vistanet.jp/samlResponse.doto replace the subdomain with your custom branding and click Next. - On Configure Identifiers screen, select Relying party trust identifier and click Next.
- Review the settings and click Next.
- Click Close to complete the wizard configuration.
- From the left pane, expand Trust Relationships menu, right-click Relying Party Trusts and select Properties.
- On the Advanced tab, select
SHA-1from the Secure hash algorithm drop-down options, and click OK.
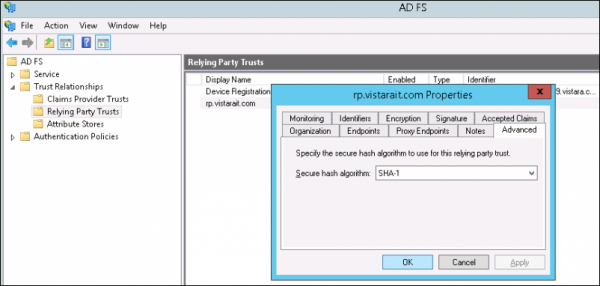
Relying Party Properties
Step 2: Edit claim rules for relying party trusts
To edit the claim rules for the relying party trusts:
- From ADFS, go to Trust Relationships > Relying Party Trusts, and select Edit Claim Rules….
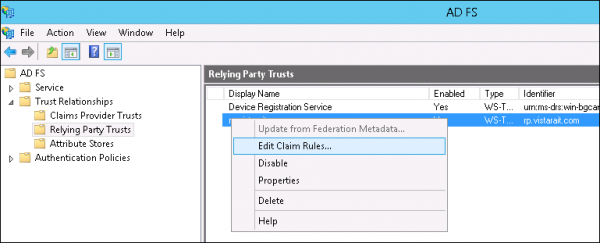
Edit Claim Rules
- Select the Issuance Transform Rules tab, select your Account Name, and click Add Rule.
- In the Edit Transform Claim Rule Wizard wizard, provide the following:
- On Select Rule Template > Choose Rule Type, set Claim rule template to Send LDAP Attributes as Claims, and click Next.
- On Configure Rule > Configure Claim Rule, provide the following information, and click Finish.
- Claim rule name: Get Attributes
- Attribute store: Active Directory
- Mapping of LDAP attributes to outgoing claim types (This step creates user information in OpsRamp):
- LDAP attributes: Outgoing Claim Type
- Email Addresses: email address
- Display Name: first and last name
- On Claim rule template, select Transform an Incoming Claim, and click Next.
- On Configure Rule, provide the following details:
- Claim rule name: Name ID Transform
- Incoming claim type: E-mail
- Outgoing claim type: Name ID
- Outgoing name ID format: E-mail
- Click Finish and OK.
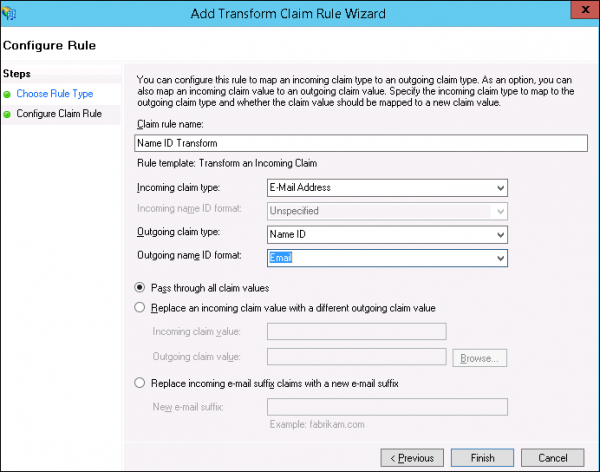
Add Transform Claim Rule Wizards
Step 3: Add rules
Rules are added to map the login name of the user to the EmailID field in OpsRamp.
To add a rule:
- Go to Trust Relationships > Relying Party Trusts and click Edit Claim Rules.
- Select the Issuance Transform Rules tab, select your Account Name, and click Add Rule.
- In the wizard, provide the following settings:
- Send LDAP Attributes: Claims
- Claim rule name: AccountName to NameID
- LDAP Attribute: SAM-Account Name
- Outgoing Claim Type: NameID
- Click Finish
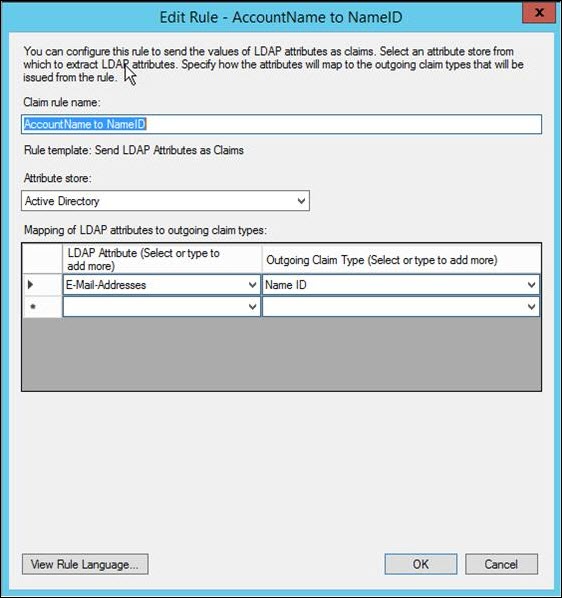
AccountName to NameID
Step 4: Edit the claims rules for claims provider
To edit the claim rules for the claims provider:
- Go to AD FS > Trust Relationships > Claims Provider Trusts.
- Select Active Directory > Edit Claim Rules and click Add Rule.
- From the Claim rule template drop-down menu, select Pass Through or Filter an Incoming Claim and click Next.
- On the Configure Rule screen, provide the following details.
- Claim rule name: Name ID Rule
- Incoming claim type: Name ID
- Incoming name ID format: E-mail
- Click Finish
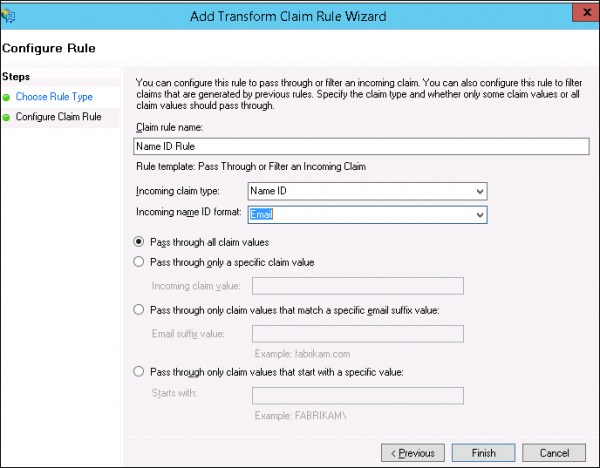
NameID Rule
Step 5: Export the certificate
To export the certificate:
- Go to ADFS > Service > Certificates.
- Select Token-signing > View Certificate… and click the Details tab.
- Click CopyFile and click OK.
- On Certificate Export Wizard > Export File format, select DER encoded BINARY X.509 (.CER) format and click Next.
- Choose a location to save your certificate and click Next.
- Click Finish and OK.
To use SSL Shopper to convert the certificate from DER to PEM format:
- Log into sslshopper.com.
- Click SSL Converter - Convert SSL Certificates to different formats.
- Select the following options and click Convert Certificate:
- Type of Current Certificate:
DER/BINARY - Type To Convert To:
Standard PEM
- Type of Current Certificate:
OpsRamp configuration
To configure SSO integration, from the console:
- From All Clients, select a client.
- Go to Setup > Integrations > Integrations.
- From Available Integrations, select SSO > Active Directory Federation Service and click Install.
- Provide the following:
- Issuer URL: Identity provider Issuer URL
- Redirection URL: SAML EndPoints for HTTP
- Logout URL: URL for logging out
- Certificate: x.509 Certificate
- Click Install.
To configure attribute mapping:
- Go to Setup > Integrations > Integrations.
- From the list of Installed Integrations, click Active Directory Federation Service.
- On the User Provision tab, verify that Provision Type is enabled as JIT.
- On the Map Attributes tab, select the OpsRamp Property drop-down and provide the following mandatory settings:
- Primary Email
- First Name
- Last Name