Introduction
SSO integration configuration is done with both PingOne and OpsRamp. The configuration sets up redirects to the custom branded URL.
Prerequisite
- Partners must register with OpsRamp to receive OpsRamp login credentials.
- Provide your custom branding URL (such as
<yourwebsitename>.app.vistanet.jp).
PingOne configuration
SSO integration with PingOne involves the following:
- Creating a certificate.
- Creating an application.
Step 1: Create a certificate
To create a certificate:
- From the PingOne console, select the SETUP tab and click Certificates.
- Click +Certificate to create a new certificate.
- From the Create New Certificate screen, provide the required details and click Save.
Step 2: Create an application
To create an application:
- From the PingOne console, select the Applications tab and click My applications.
- Click the SAML tab.
- From the Add Application drop-down options, select New SAML application.
- Provide the application information and click Continue to Next Step.
- From the Application Configuration screen, provide the information and click Continue to Next Step:
- Assertion Consumer Service (ACS): https://
.app.vistanet.jp/samlResponse.do - Entity ID: https://
.app.vistanet.jp - Application URL: https://
.app.vistanet.jp
- Assertion Consumer Service (ACS): https://
- Provide information for SSO attribute mapping and click Continue to Next Step.
- Provide Group Access and click Continue to Next Step.
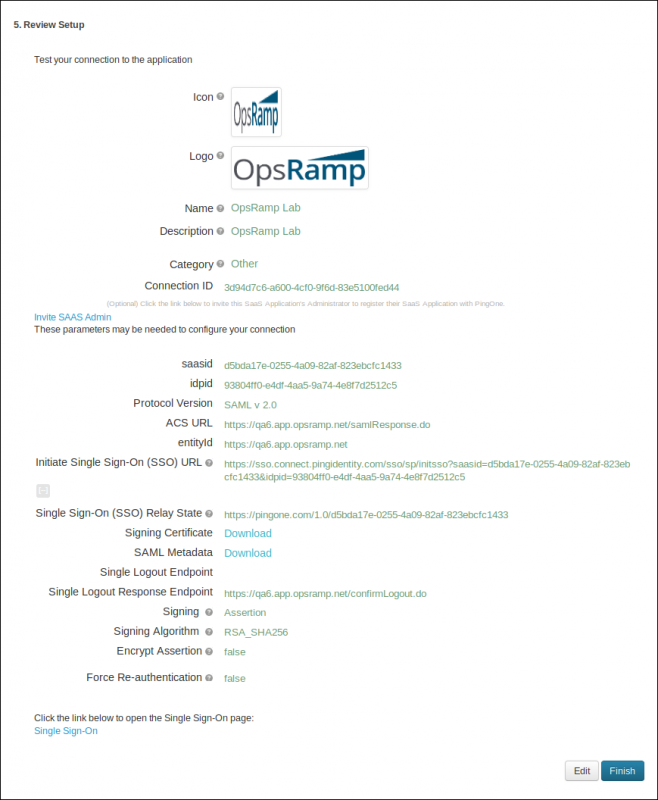
- Perform the following from the Review SetUp screen:
- Click Download on Signing Certificate and from the
.cerfile, save the certificate. - Click Download on SAML Metadata and copy the entityID URL.
Example: If the entityID URL is
<md:EntityDescriptor entityID="https://pingone.com/idp/sandbox.opsramp"ID="g7r1YVie-iqysV037OuX9rIpUDO" xmlns:md="urn:oasis:names:tc:SAML:2.0:metadata">then the issuer URL ishttps://pingone.com/idp/sandbox.opsramp. - Copy Initiate Single Sign-On (SSO) URL.
- Click Download on Signing Certificate and from the
- Click Finish to save the configuration.

Setup SSO Summary
OpsRamp configuration
To configure SSO integration:
- From All Clients, select a client.
- Go to Setup > Integrations > Integrations.
- From Available Integrations, select SSO > PingIdentity and click Install.
- Provide the following:
- Issuer URL: Identity provider Issuer URL
- Redirection URL: SAML EndPoints for HTTP
- Logout URL: URL for logging out
- Certificate: x.509 Certificate
- Click Install.