Introduction
Incident management is a process to restore a normal service operation as quickly as possible to minimize the business impact. The process is responsible for managing the lifecycle of all incidents. Incident management ensures that service quality is maintained as defined in the Service Level Agreement (SLA).
Incidents are events reported by monitoring applications or user queries that needs clarification. An incident is created when an intervention is required to restore agreed service to the business. The failure of a component of a service that has not yet impacted service is also an incident.
For example:
- High CPU utilization in a server.
- Failure of a sever or disk.
Configuring incident settings
Customize incident details by creating custom fields in addition to the predefined fields.
To configure incident settings:
- From All Clients, select the client.
- Go to Setup > Service Desk > Configuration > Settings.
- Click Incident.
- From INCIDENT SETTINGS, configure the property settings.
- Click Update.
Creating incidents
Incidents can be created using:
- Service Desk
- Alerts
- Closed incidents
Create incidents on Service Desk
To create a new incident on Service Desk:
- Select Service Desk from the drop-down menu.
- Click the + button and select Incident.
- On the New Incident page, provide the required information.
- Click Create.
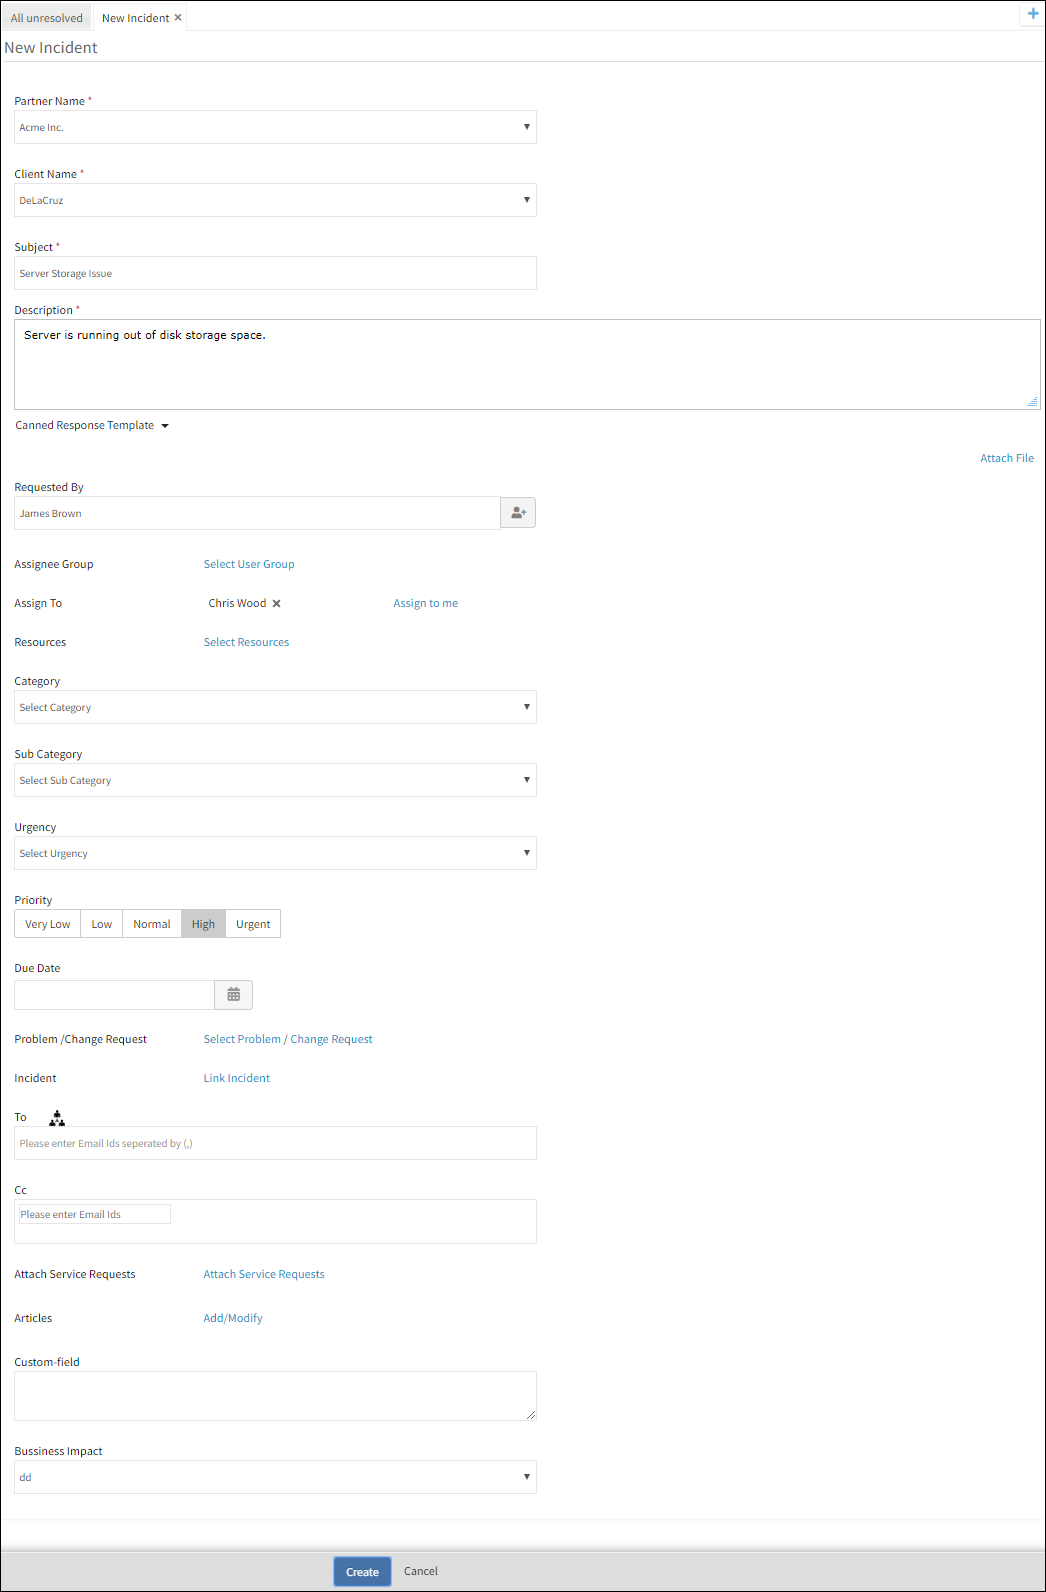
Create New Incident
Supported fields
| Field name | Description |
|---|---|
| Partner Name | Select the partner. |
| Client Name | Select the Client. |
| Subject | Title or short summary of Incident |
| Description | The information required to describe Incident scenario. This can include the actual behavior, expected behavior, steps to reproduce the issue etc |
| Attach file | The artifacts required to support Incident. Example: error messages, screenshots, excerpt from log files. Supported file types: `.txt`, `.jpg`, `.zip`, `.docx`, `.odt`, `.odg` and `.xlsx`. File size limit: 32 MB |
| Requested By | User who requests Incident |
| Assignee Group | User group that manages Incident |
| Assign to | User who acts on Incident |
| Resources | Devices on which Incident is identified |
| Category | Category to which the Incident is mapped |
| Sub Category | Subcategory under the category to which the Incident is mapped |
| Business Impact | Severity of Incident on the business |
| Priority | Measure of how soon Incident needs to be resolved |
| Due date | Expected date to resolve Incident |
| Attach Problem/Change Request | Attach an existing Problem or Change Request that corresponds to Incident |
| To | Email addresses of the users who need to act on Incident |
| Cc | Email addresses of the users who need to be copied in the email notification |
Creating incidents through email
To install a new email integration:
- Go to Setup > Integrations > Integrations.
- In the Available Integrations, click Email Requests.
- In the Install Email Requests Integrations screen:
- Provide a name of the integration.
- Specify Request Type as
Incident. - Upload an image file if required.
- Click Install.
- Click the copy icon in Incoming Email Address.
- While composing Incident email, provide the following in the email fields:
- To: Incoming Email Address
- Subject: Incident subject
- Email Body: Description of Incident
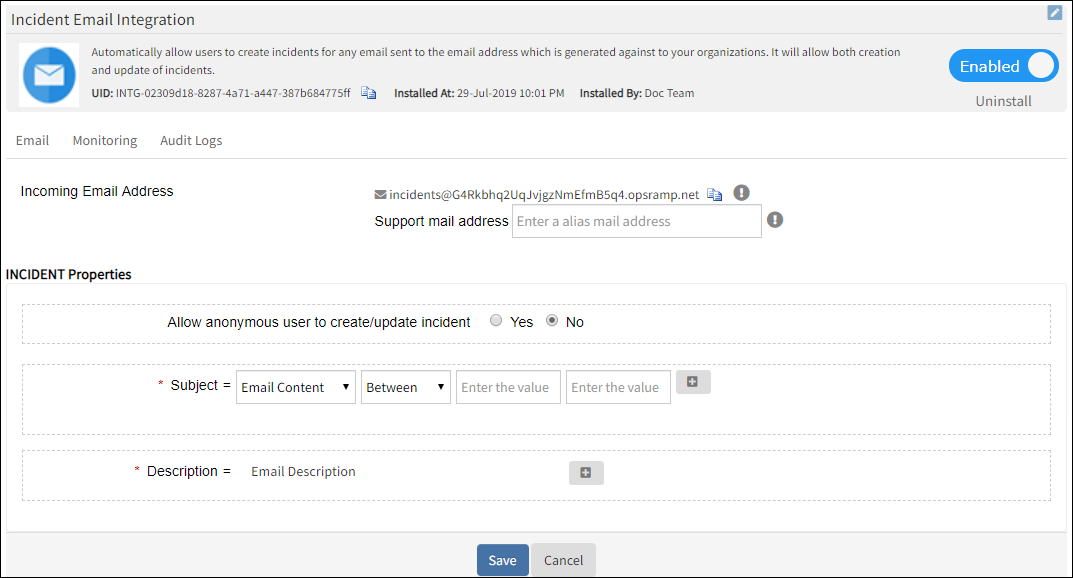
Incident Email Request
Create incident from alerts
To create an incident from an existing alert**
- Go to Alerts, click alert subject. Alert details page is displayed.
- In the Alert Details page, click Create Incident. The Create Incident window appears.
- In Create Incident window, provide the incident details.
- Click Save.
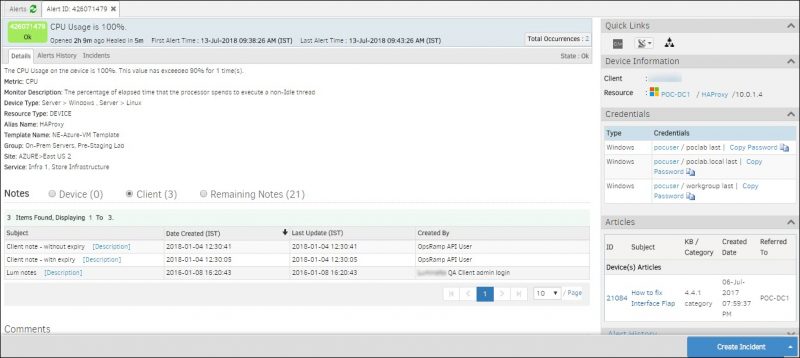
Alert Incident
Creating incidents from closed incidents
If a closed incident needs to be reviewed or a similar issue needs to be reported, create a new incident and attach the closed incident to the same.
Prerequisite:
You need to activate Enable to create a follow-up Incident setting in the Incident Settings page to be able to view Create Follow-up option.
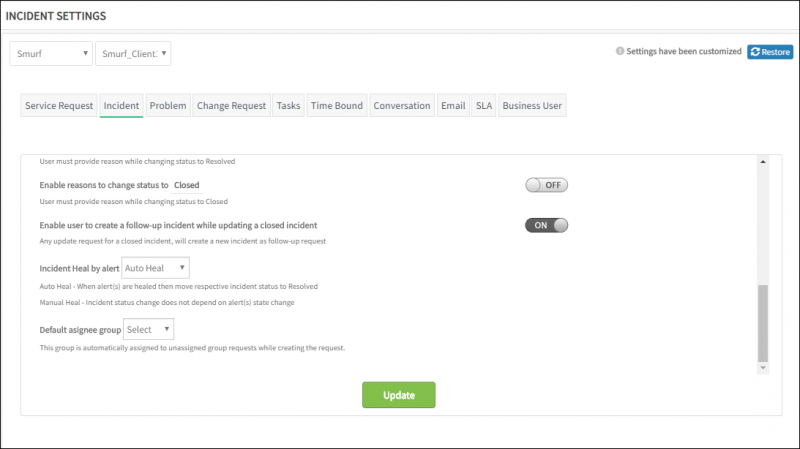
Enable Follow Up Incident
To create a follow-Up incident:
- Go to Service Desk, select a closed incident.
- Click Create Follow-Up.
- From the New Incident page, provide incident details.
- Click Create.
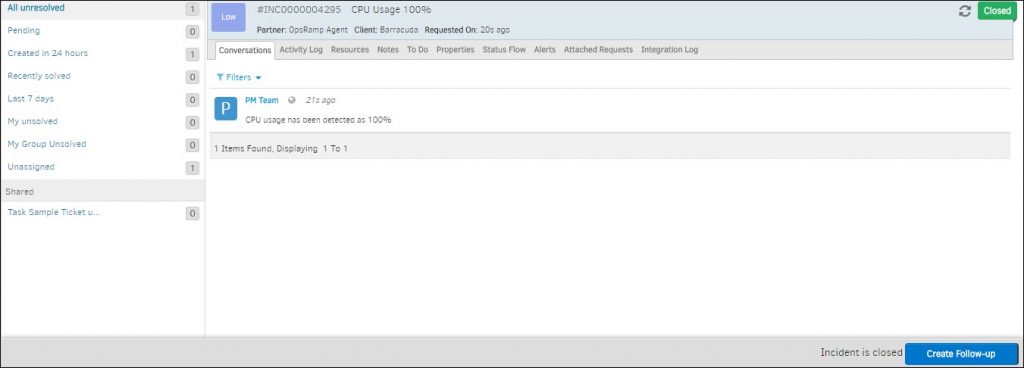
Create Follow Up Incident
Viewing incidents
Incident details page provides the following attributes.
| Tabs | Description |
|---|---|
| Conversations | Comments added by assignee or creator which can be viewed by all users in assignee group. |
| Activity Log | User activities on Incident. |
| Resources | The resources on which Incident is identified. |
| Notes | Useful information or hint for Incident Resolution. Viewed by all users of assignee group. |
| To Do | Information recorded by a user for self-reference. Viewed by single user. |
| Properties | Incident details. |
| Status Flow | The flowchart representation showing Incident status change. |
| Alerts | Alerts details corresponding to Incident. |
| Articles | Knowledge Base articles that refer to the resolution of similar incidents in the past. |
| Attached Requests |
|
| Integration Log | The inbound and outbound communication details between OpsRamp entities and third-party entities. |
Editing incidents
To edit an Incident:
- Click Service Desk
- Click Incident. Incident details page appears.
- Click the Edit button and edit the required fields.
To edit multiple Incidents:
- Click Service Desk.
- Click the bulk update button and select the number of incidents to be edited.
- Select Apply Actions option. Update Actions window appears.
- Select the required changes and click Update.
Associating incidents to other entities
Linking incidents to problem or change request
Link an incident to a problem, change request or another incident while creating or editing the Incident.
To link an incident:
- Click Service Desk.
- Click Incident ID. The Incident Details page is displayed.
- In the right side pane of the Incident Details page, click Problem / Change Request or Link Incident.
- Clicking Problem / Change Request opens Service Change Request window.
- Clicking Link Incident opens Select Incident window.
- Select the required Request Id. The entity is attached to Incident.
Linking service requests to incidents
Link single or multiple service requests to an incident if there is an existing service request that has already been created and is relevant to your context. As service requests are resolved and closed, incident gets automatically closed.
To link a new Incident to existing Service Request:
- From the options in the drop-down menu, click Service Desk.
- Click New and then click Incident. The New Incident page is displayed.
- In the New Incident page, click Attach Service Requests. The Service Requests page is displayed.
- Select the required service request then click Create.
To link an existing Incident to Service Request
- Click Incident.
- Click Attached Requests, then click Add/Modify.
- Select the required service request and click Update.
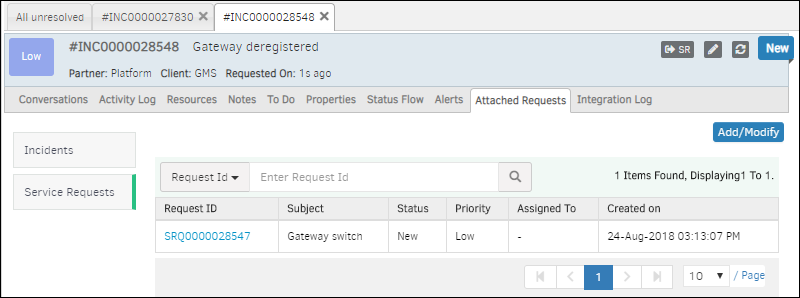
Link Existing Incident to SR
Converting incidents to service requests
You can convert an incident to a service request if the entity conforms to the service request criteria.
To convert an incident to a service request:
- Click Incident.
- Click SR and then confirm.
- The Incident is converted to service request and the parent Incident number is shown.
Closing incidents
Configure Auto-Close Policies to close Incidents that are resolved and that are in inactive state since a certain elapsed time.
To add an Auto-Close Policy:
- Go to Setup > Service Desk > Auto Close Policies.
- From AUTO CLOSE POLICIES, select the client and click Auto Close Incidents.
- From EDIT AUTO CLOSE POLICY, provide the following:
- Name: Name of the Auto-Close policy
- Resolved Tickets Above: The inactive period of a resolved Incident beyond which the Incident needs to be closed
- Click Submit.