Introduction to process definition
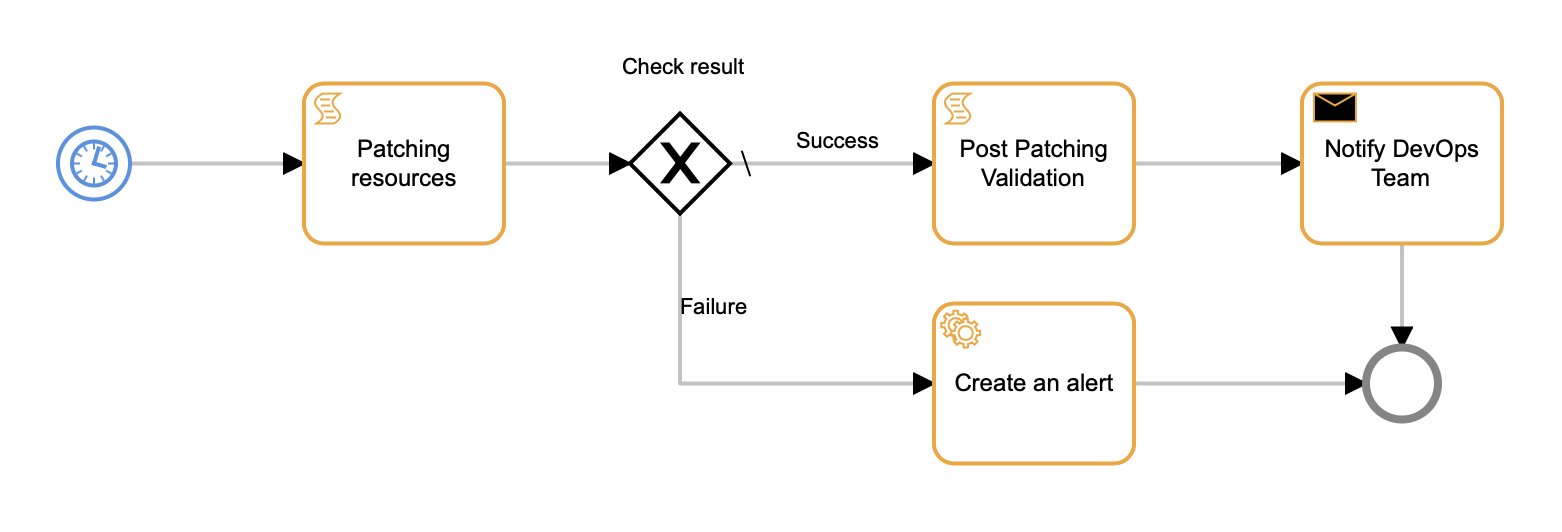
Process definition permits you to define a sequence of tasks to run automatically. Starting with a triggering event, such as a timer or signal, you can describe sequential tasks in a workflow that handles the event. As an example, the following process definition and deployment tutorial describes an automated process that periodically checks patching requirements, applies and validates the patch, and sends an email notification to DevOps:

Process Definition Example
The process definition user interface (UI) provides drag-and-drop functionality to visually define the workflow. Key workflow visualization components include:
- start and stop events, or states
- tasks to process the event and produce data for downstream processing
- gateways as decision points in event processing
- connectors to connect events, tasks, and gateways
Each component class is typed according to the kind of action it performs, with properties for customizing the workflow to meet automation and remediation requirements. The UI provides a rich set of operations to create and edit workflows.
To begin, the partner needs to set up and enable the client for automation and remediation.
Set up process definition
To automate activities using process definition, the partner needs to enable the Remediation and Automation product package for the client. If the client attempts to use process definition and the partner is not subscribed to the package or the package is not enabled, the UI displays an error message:
Access Denied! This Partner is not subscribed for this product package.
When you create a client, select the Remediation and Automation package in the Product Package creation step to enable process automation.
If the client is already set up but does not have Remediation and Automation enabled,
- From the main menu, choose Setup and in the Accounts section, choose Clients.
- Click the name of the client you want to enable.
- On the CLIENT DETAILS page, in the PRODUCT PACKAGES section, click Edit.
- Select the Remediation and Automation package.
- Click Finish
Enable process automation at the partner level:
- From the main menu, choose Setup and in the Accounts section, choose Partner Details.
- Click Edit.
- Click the Add Ons tab.
- Select Process Automation.
To verify that process definition is enabled for the client, choose Automation > Process Definitions. If successfully enabled, the PROCESS DEFINITIONS page permits you to create a new process, edit an existing process, and use advanced functions to manage process definitions.
Next steps
After the Remediation and Automation package is enabled for the client, follow the steps in the Define and Deploy a Process tutorial for a hands-on introduction to process definition. Refer to the User Interface Elements section as needed to learn more about the options available at each step.
See Advanced Process Definition Topics to view, edit, copy, and delete existing process definitions. The copy feature can provide a foundation for creating a new process definition.
Throughout the workflow, refer to the Process Definition Reference for detailed information about working with process definition components and configuring component properties.